Written by
devvv (09 Dec 2007 05:58 PM)
Translated to English by
Paraknight
Updated by Hammer
Video Help
-
Like some
others, this tutorial is an implementation of an existing Photoshop tutorial.
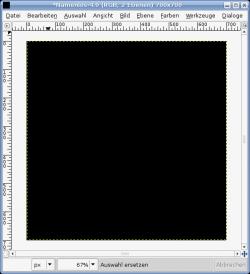
Create a new image (700px * 700px) with a black background color.
click to
enlarge
-
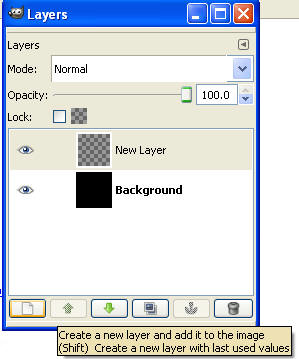
Create a new layer - Click CTRL - L to open the
layers dialog box. In the lower left click the "Create a new layer button".
Make sure to set the layer to 700 x 700 and select "Transparency" at the
bottom.
-
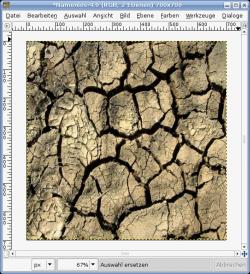
Click
Download Picture,
open the JPG and copy the cracked soil into GIMP. At the top click
"Layer" and the "Anchor Layer."
click to
enlarge
-
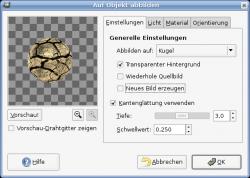
Now, stretch
the active layer on a ball: Go to Filters / Map / Map object and select
"sphere". See the settings in the picture below. In the "light" tab select: No
light.
click to
enlarge
-
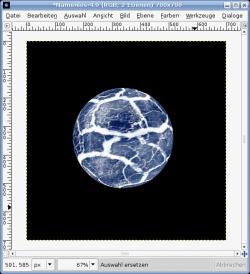
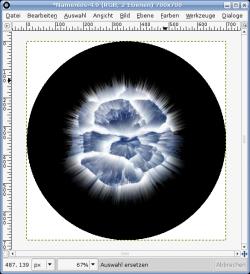
Invert the
colors (Color / Invert). You will get a blue and white sphere:
click to
enlarge
-
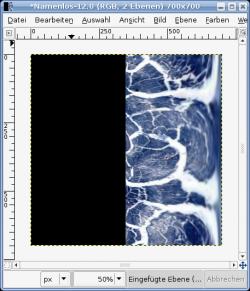
We will now
add the exploding rays. For this we first need the sphere streched on the
layer: Filters / Distorts / Polar coords. Disable the bottom-right checkbox
"To Polar". Click OK.
Then go to Image / Transform / Rotate 90° CW.
click to
enlarge
-
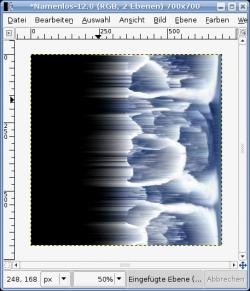
Click Filters
/ Distorts / Wind with the values:
Wind
Direction: Right
Edge affected: Leading
Threshold: 5
Strength: 37
Use the filter again by pressing CTRL+F.
click to
enlarge
-
Now we must
undo the stretching from before to get our sphere:
- Turn the Layer by selecting Layer / Transform / 90° CCW. It should now be on
the top side.
- Now select Filters / Distorts / Polar coords. Check the box for "To Polar"
again.
click to
enlarge
-
Now it looks
quite cool.
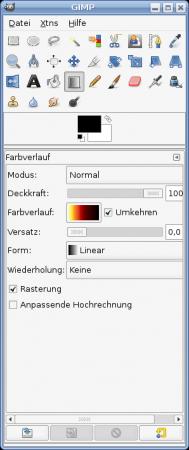
Select the Blend
tool. Search for the Incandescent gradient as seen on the picture.
click to
enlarge
-
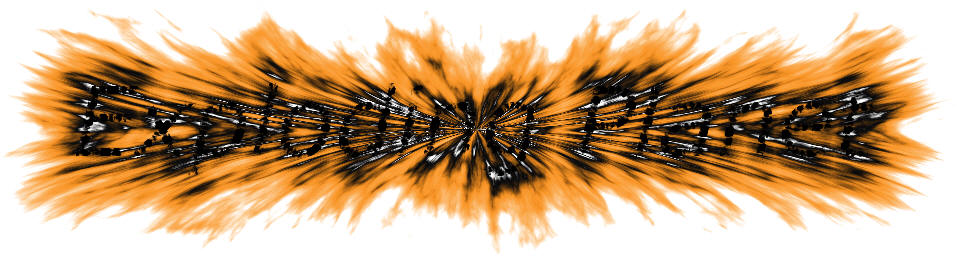
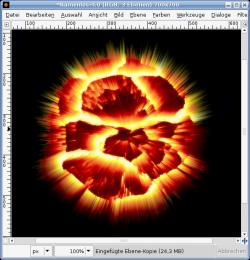
Turn it around
and go to Colors / Map / Gradient Map and you have your exploding
planet!
Optionally, you could duplicate the planet layer. Soften this layer with the
value 11, turn the transparency of the layer to 65% and change the layer mode
to "screen" or "color". Thus, it reached a little more color intensity and
softer transitions. Have fun with it.
click to
enlarge


